(Nederlandse vertaling onderaan)
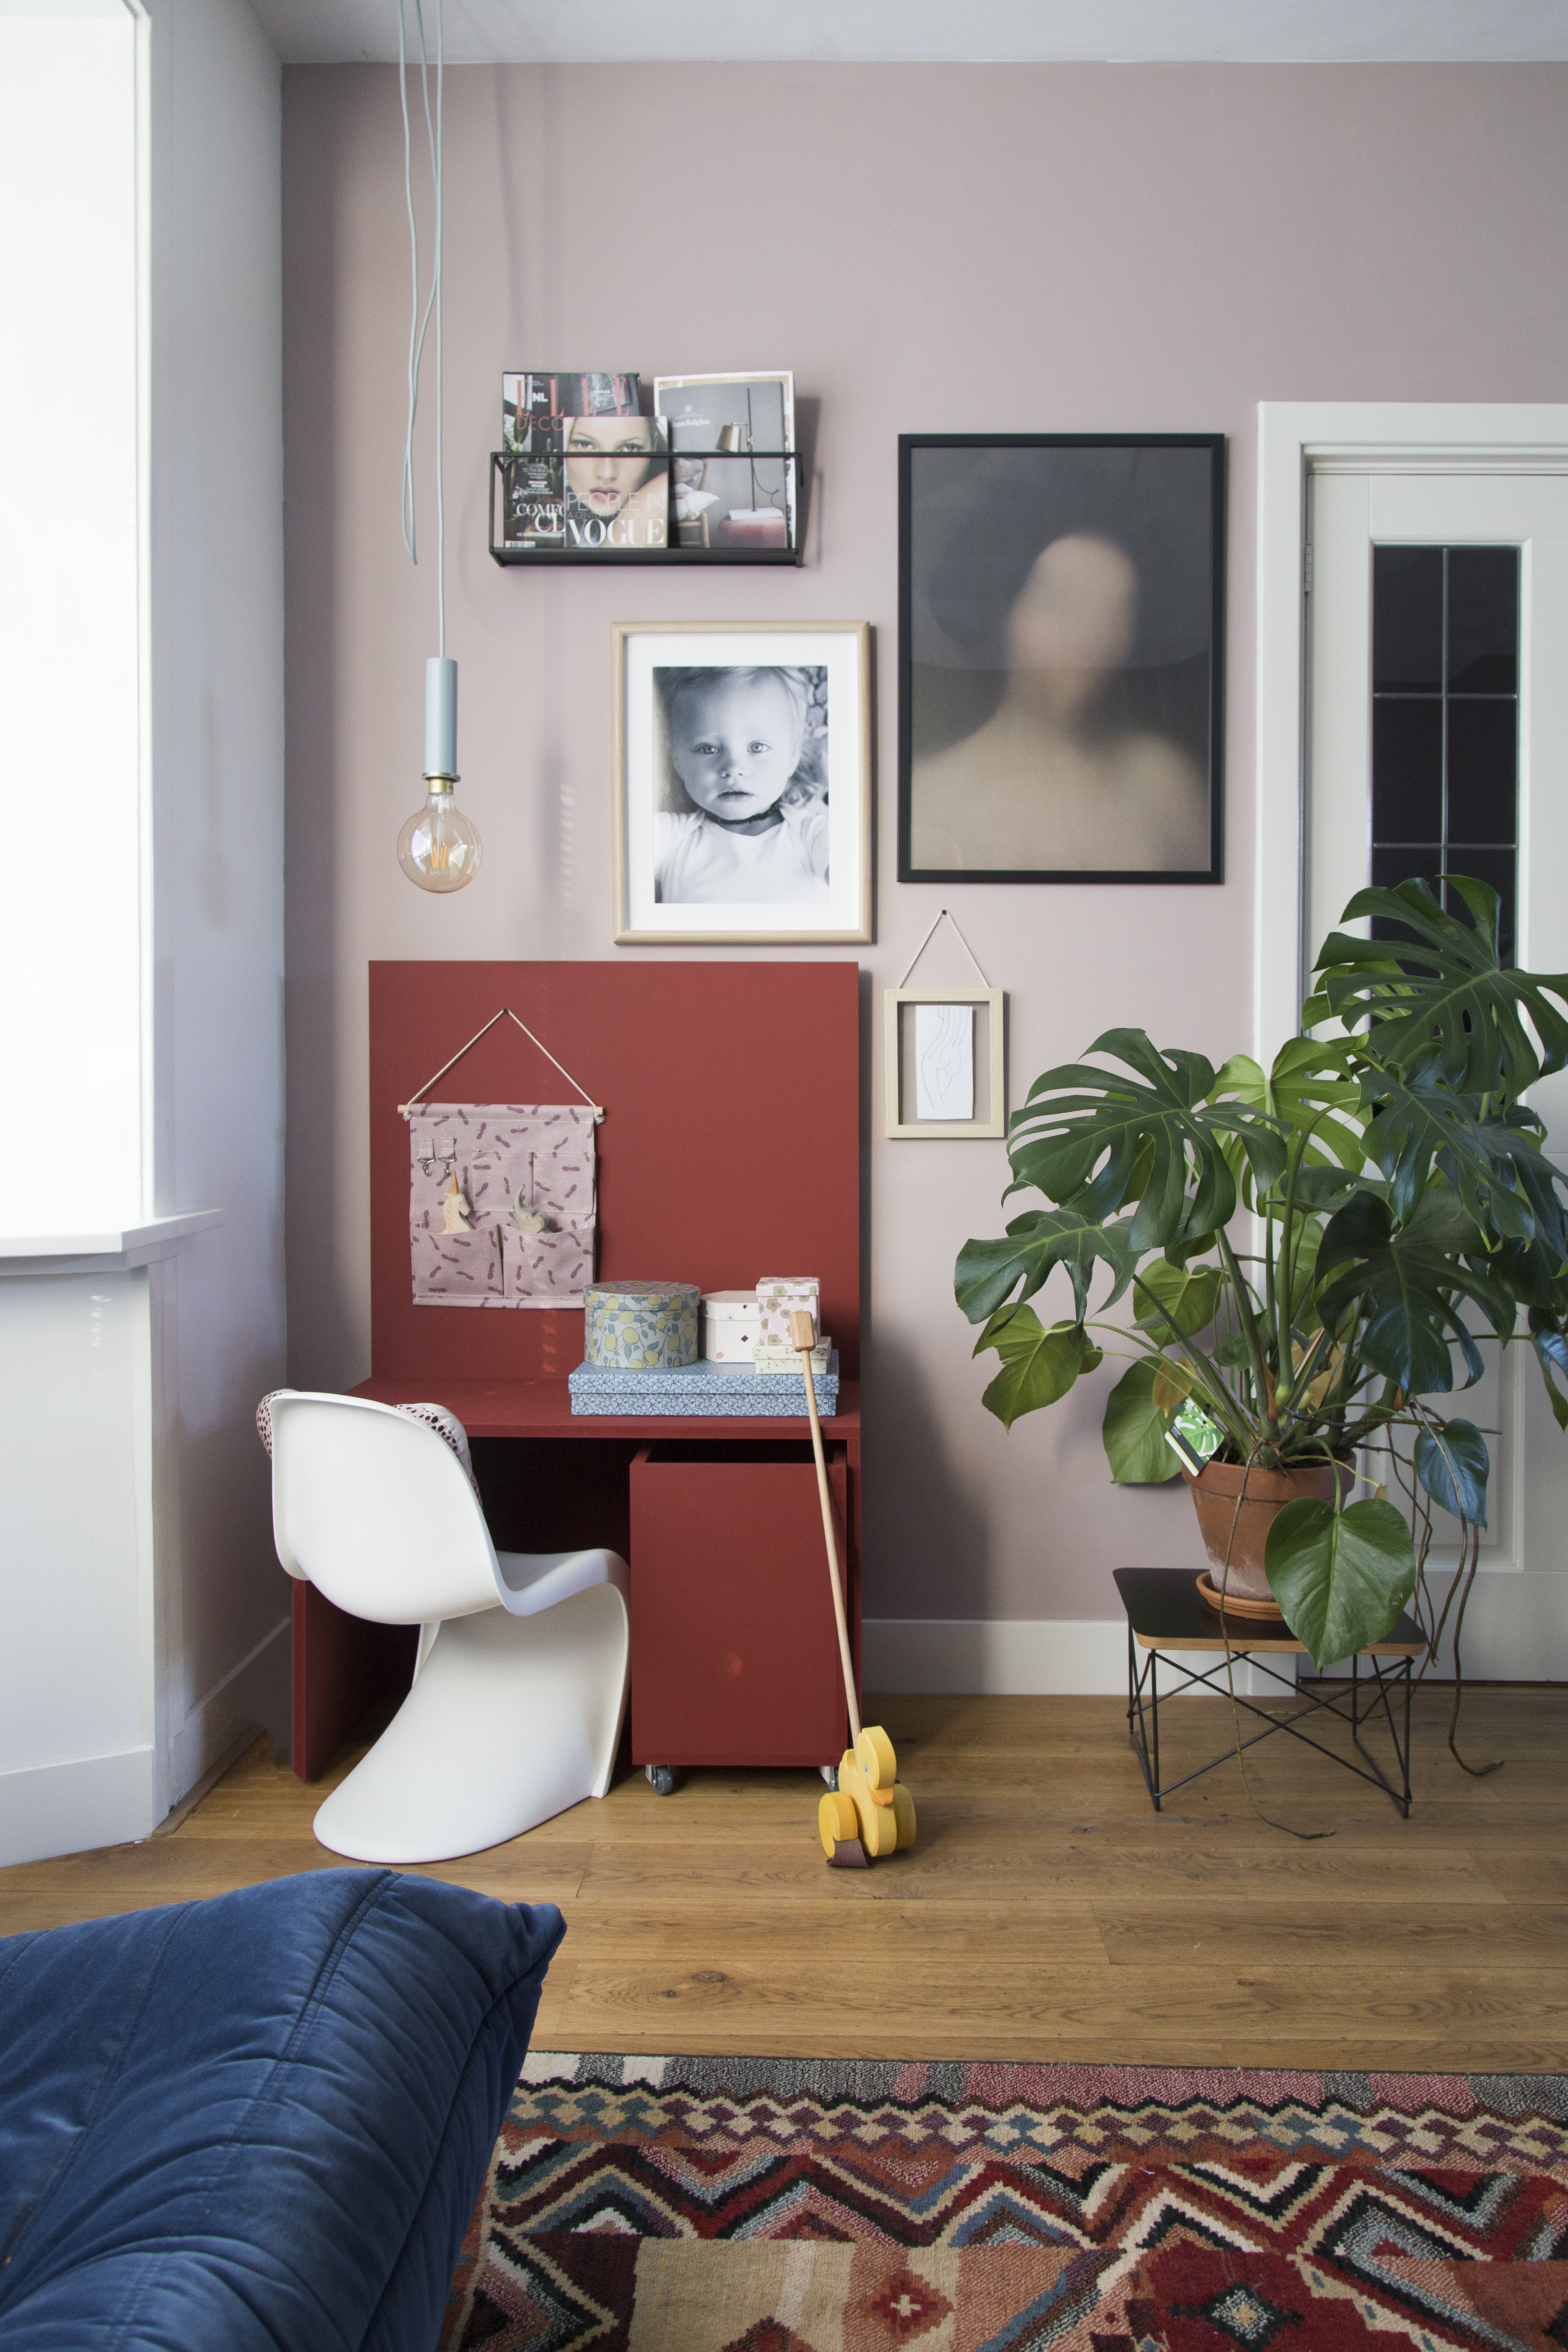
A while ago BLACK+DECKER asked me to join their campaign #madeforimaginations to create a DIY project using their tools. Together with my husband we thought of what would be the perfect addition to our home and quickly decided we wanted to make something for our daughter Mia. I loved the idea of having a play area for her, where she could sit at a table, and have her own spot. And while we thought we would do a very simple DIY, I have to admit I am in love with the result. It turned out to be so cute and just perfect for this area!

The best thing about DIY’ing instead of buying it, is you can adjust it specifically to the size you need. In this case we knew the exact spot for this DIY, so we worked around the frame collage that was already in our livingroom. We got to choose 3 tools for this project and we chose a drill driver, a circulair saw & a sander. Now let’s go into detail!
Things you’ll need for this project:
– MDF
– drill driver
– saw (of preference)
– sander
– paint of choice
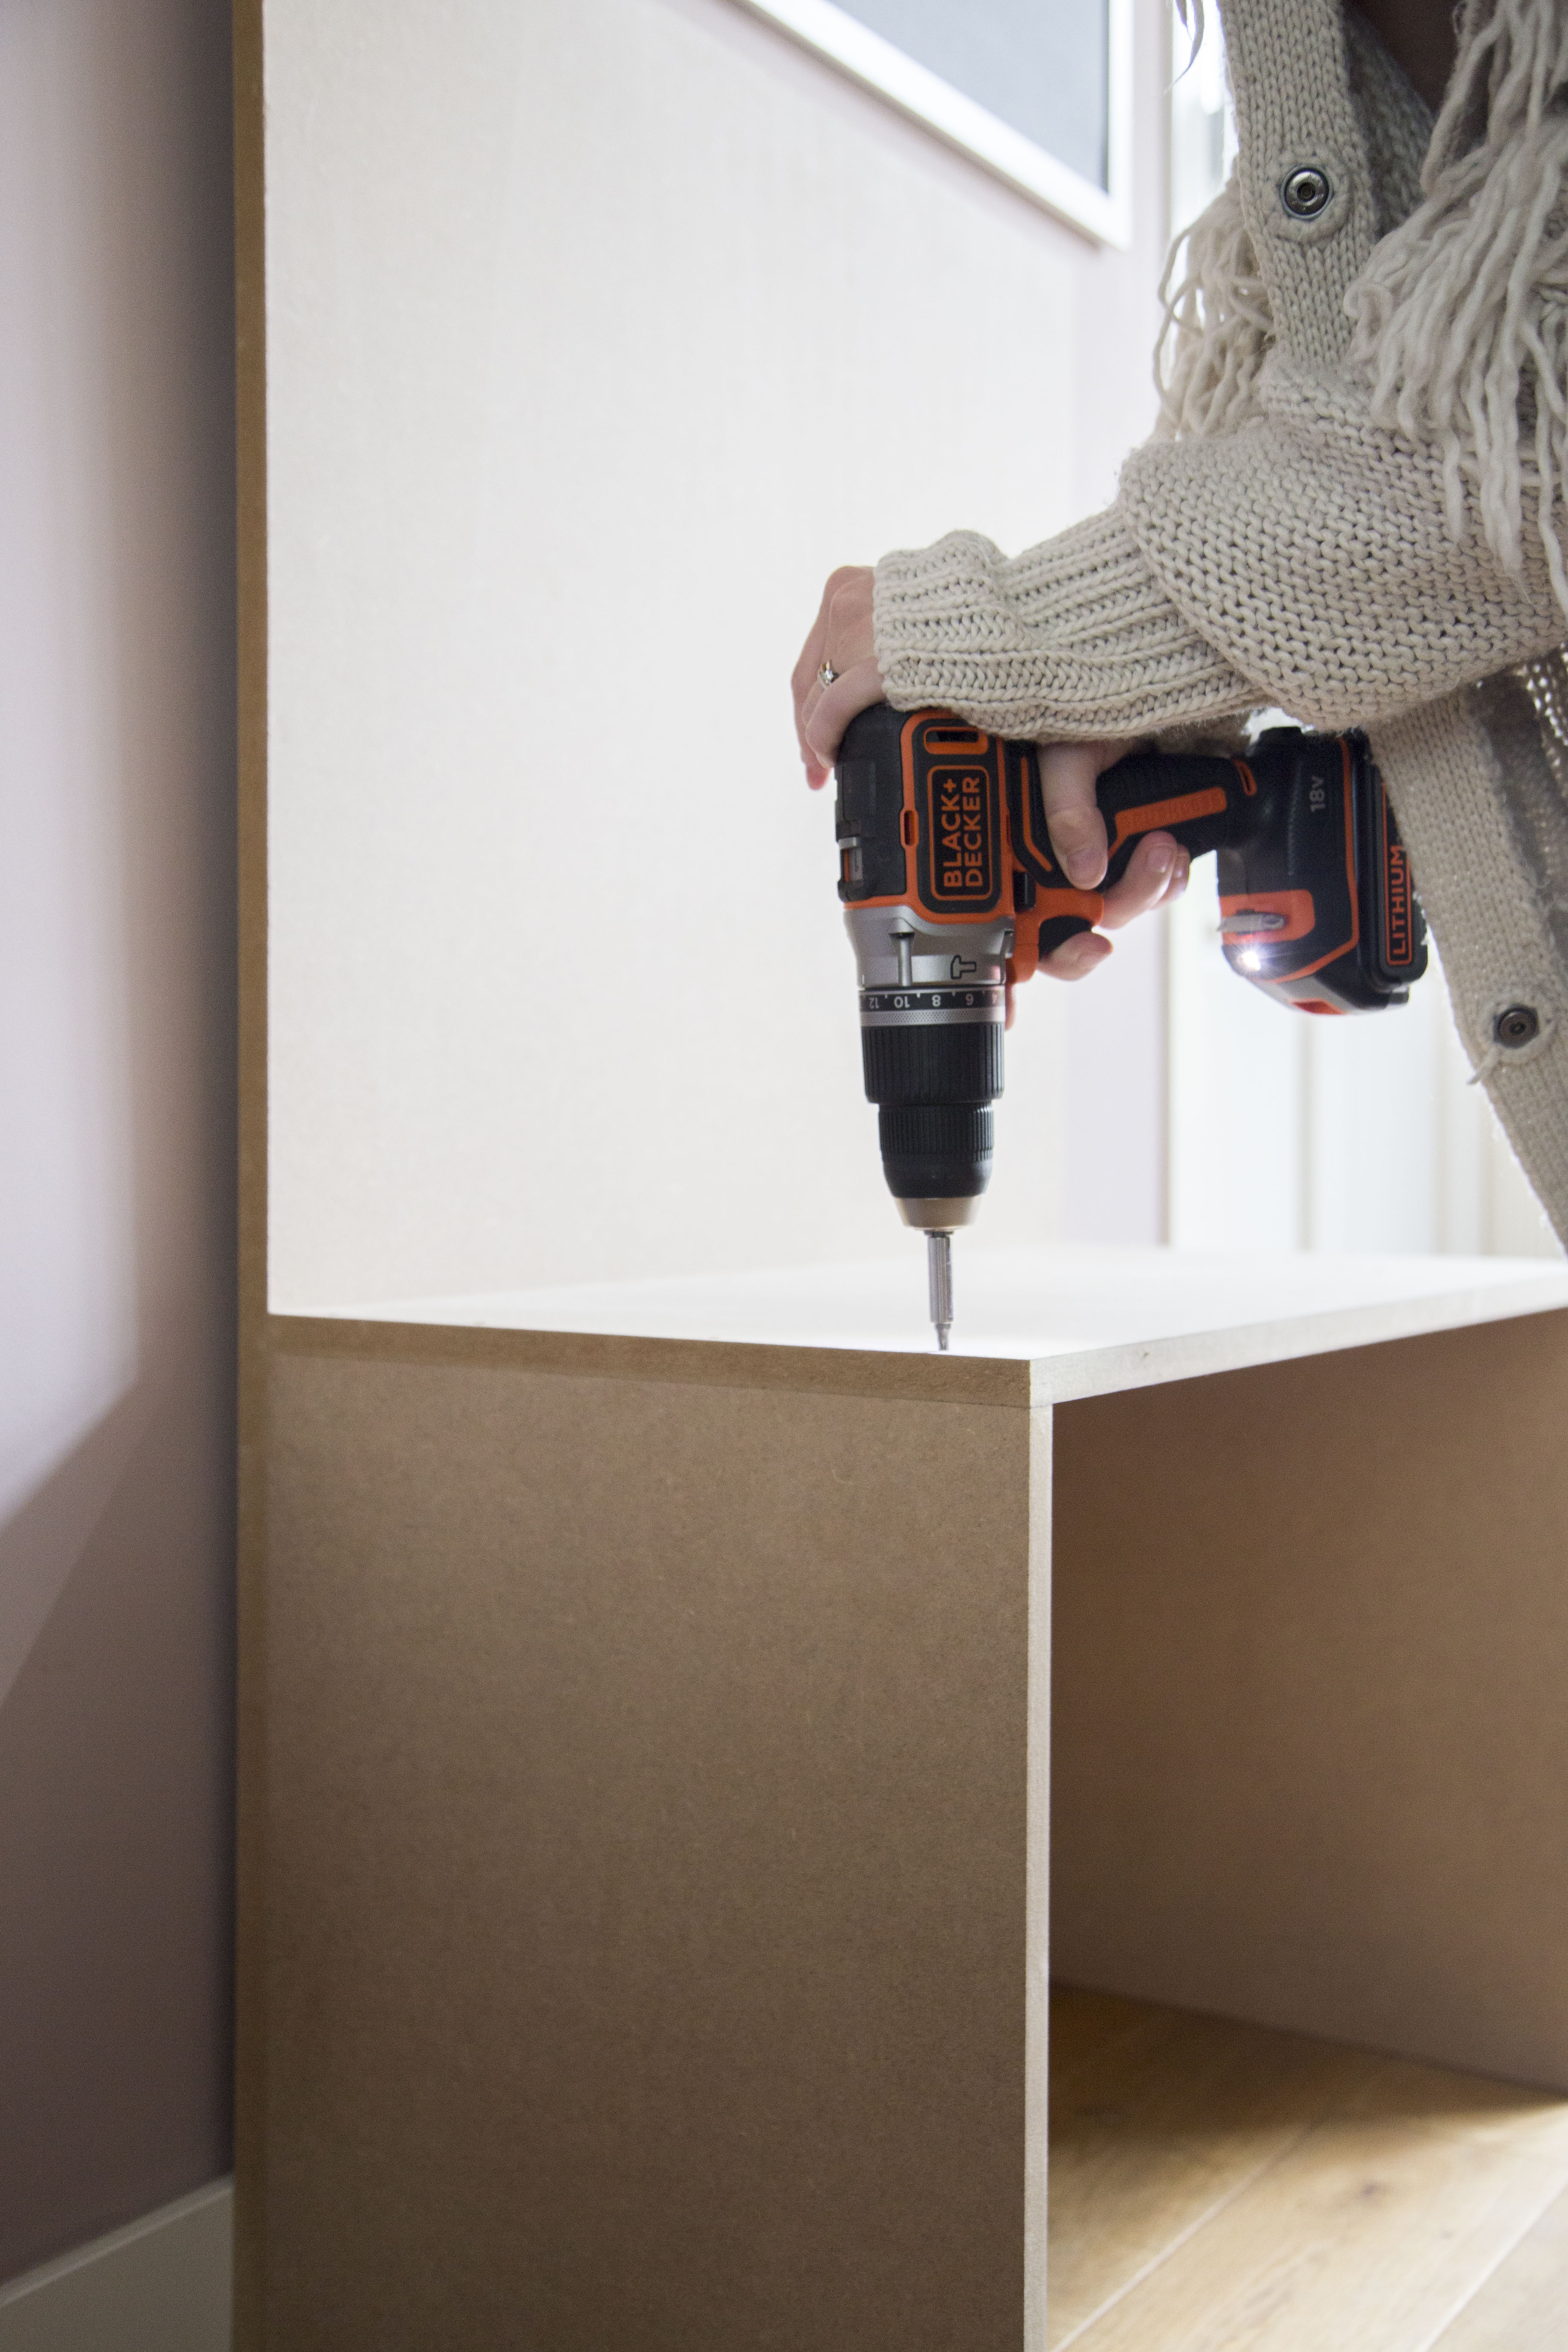
So after we sawed the MDF boards into their preferred sizes, we used screws to put them together. The design was pretty simple. We wanted to make a table with a backdrop, where we could hang stuff like drawings. So basically all we needed were 4 MDF boards and screw them together. We started by screwing the table together and then added the backdrop. And then our project came to life already! Trust me, it’s very easy. We decided to paint this play area with wall paint from Mia’s room. First you fill up the screw holes with filler and then you’re ready to paint!
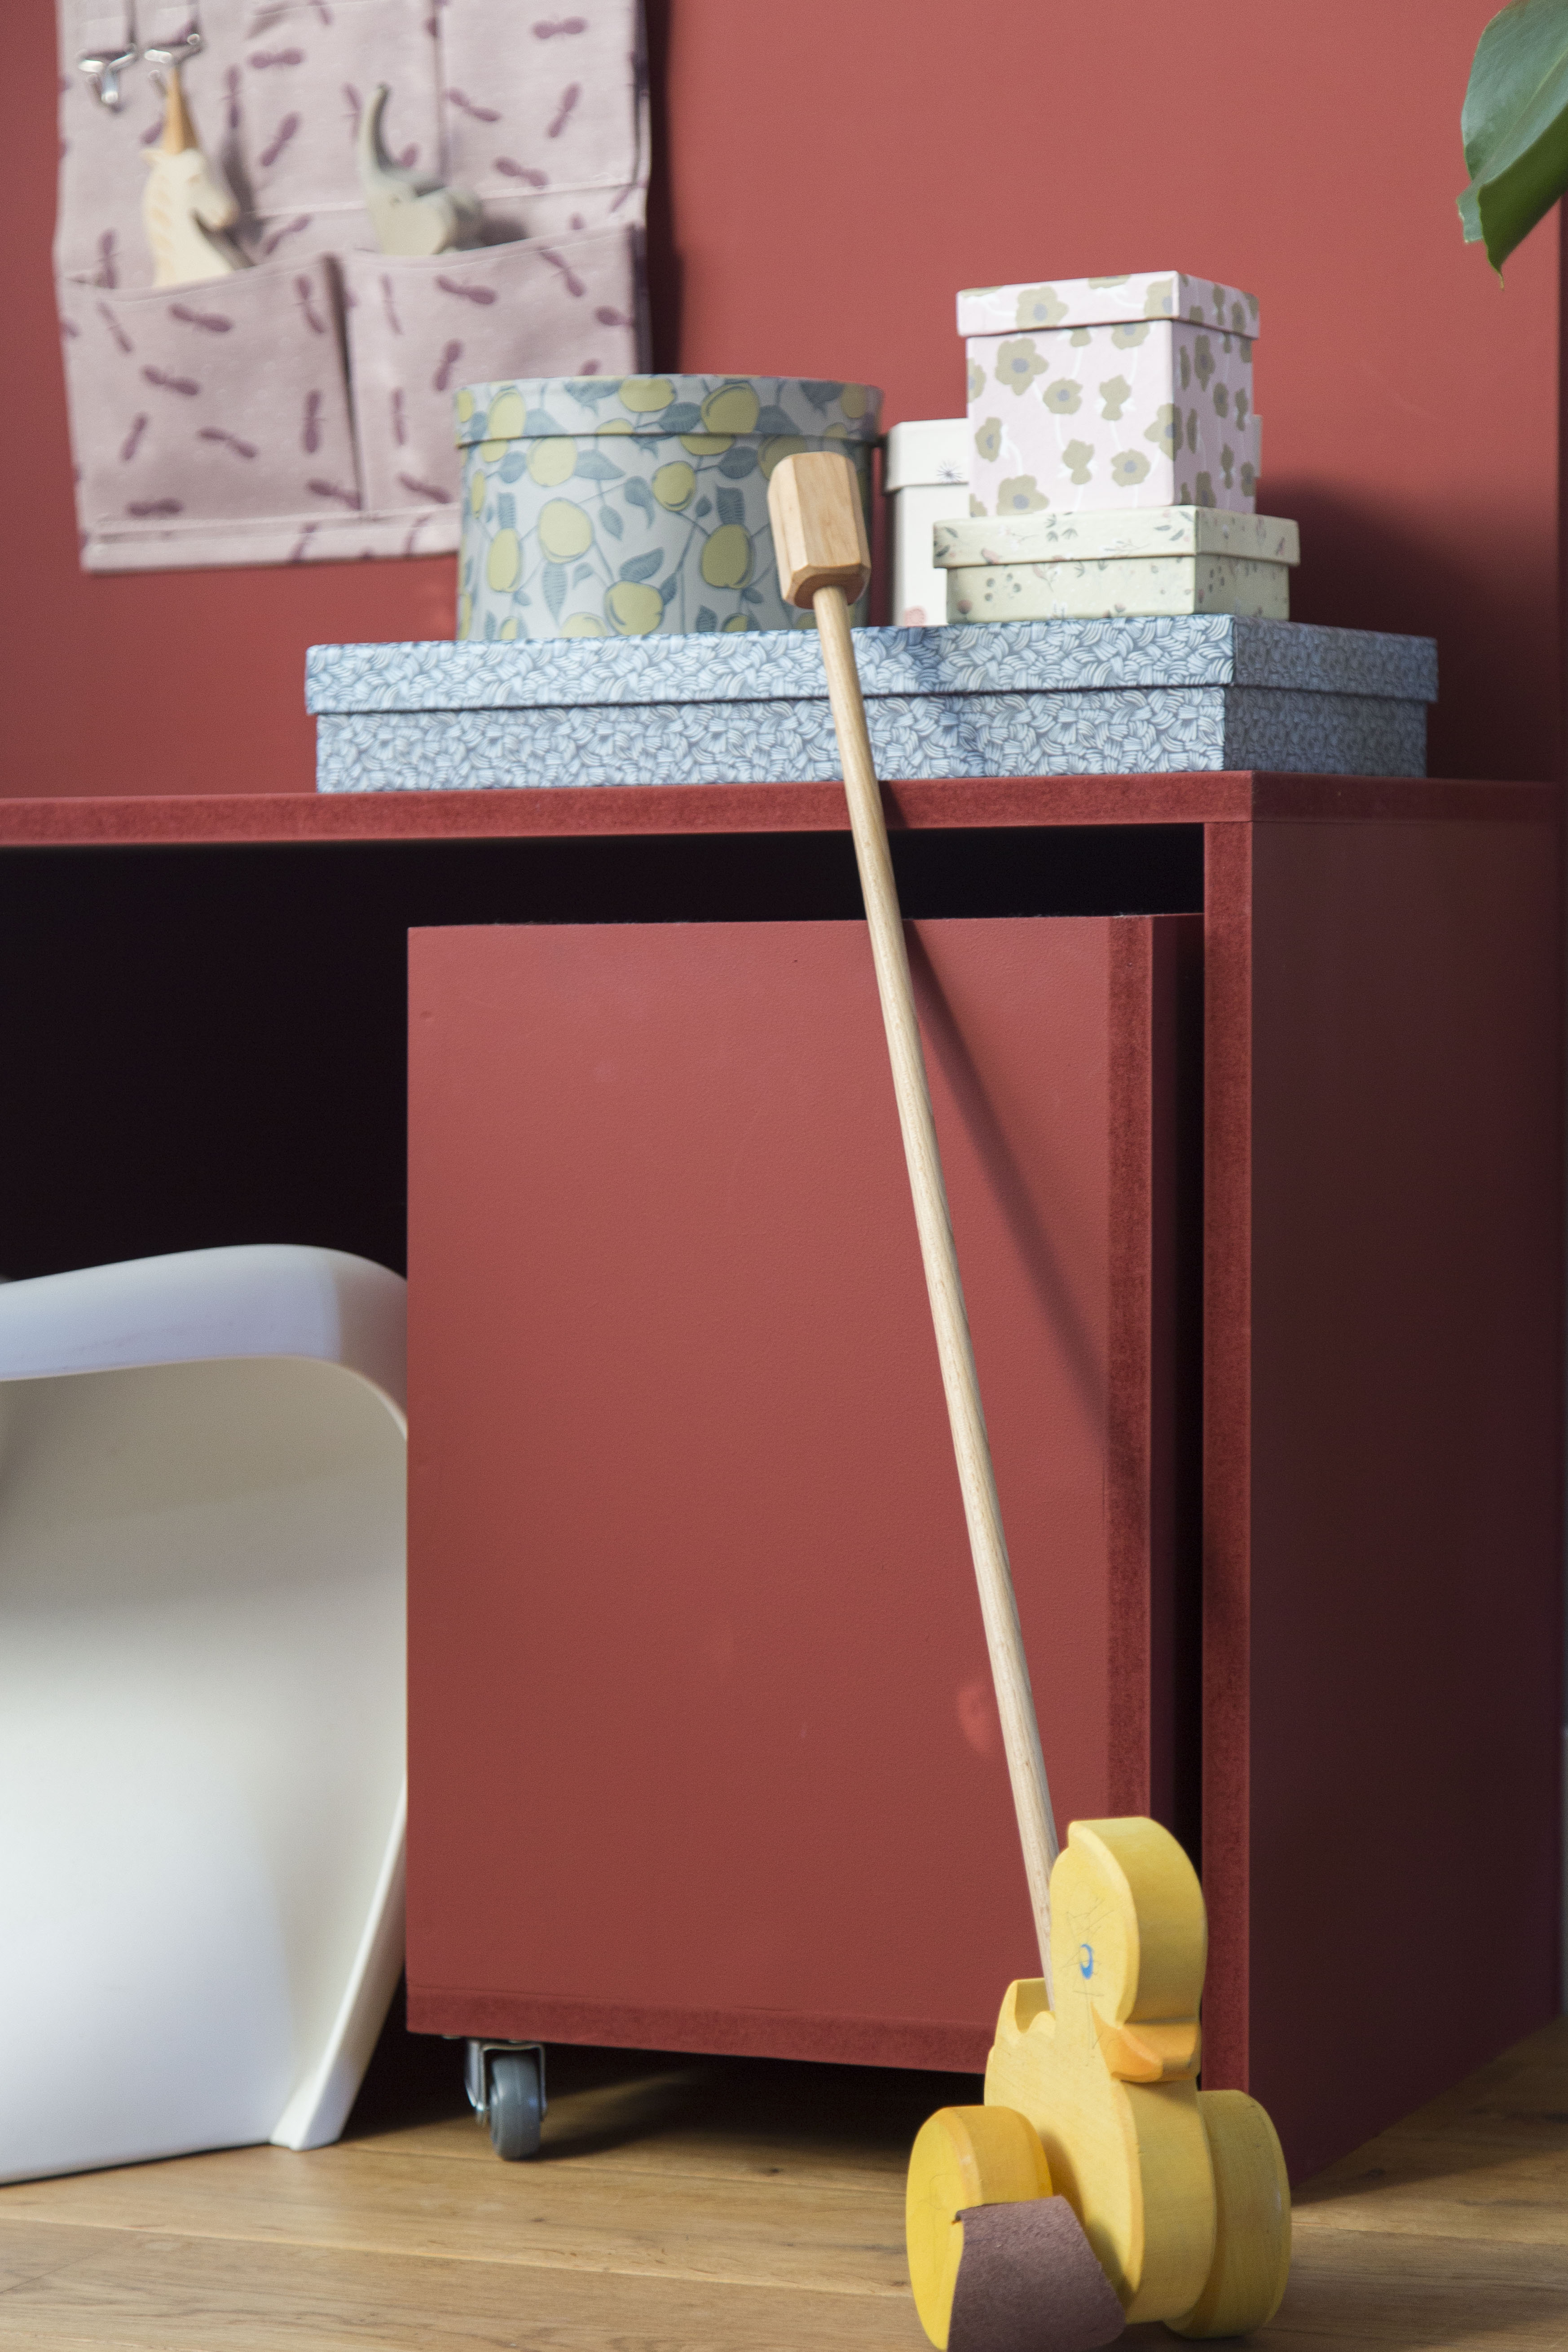
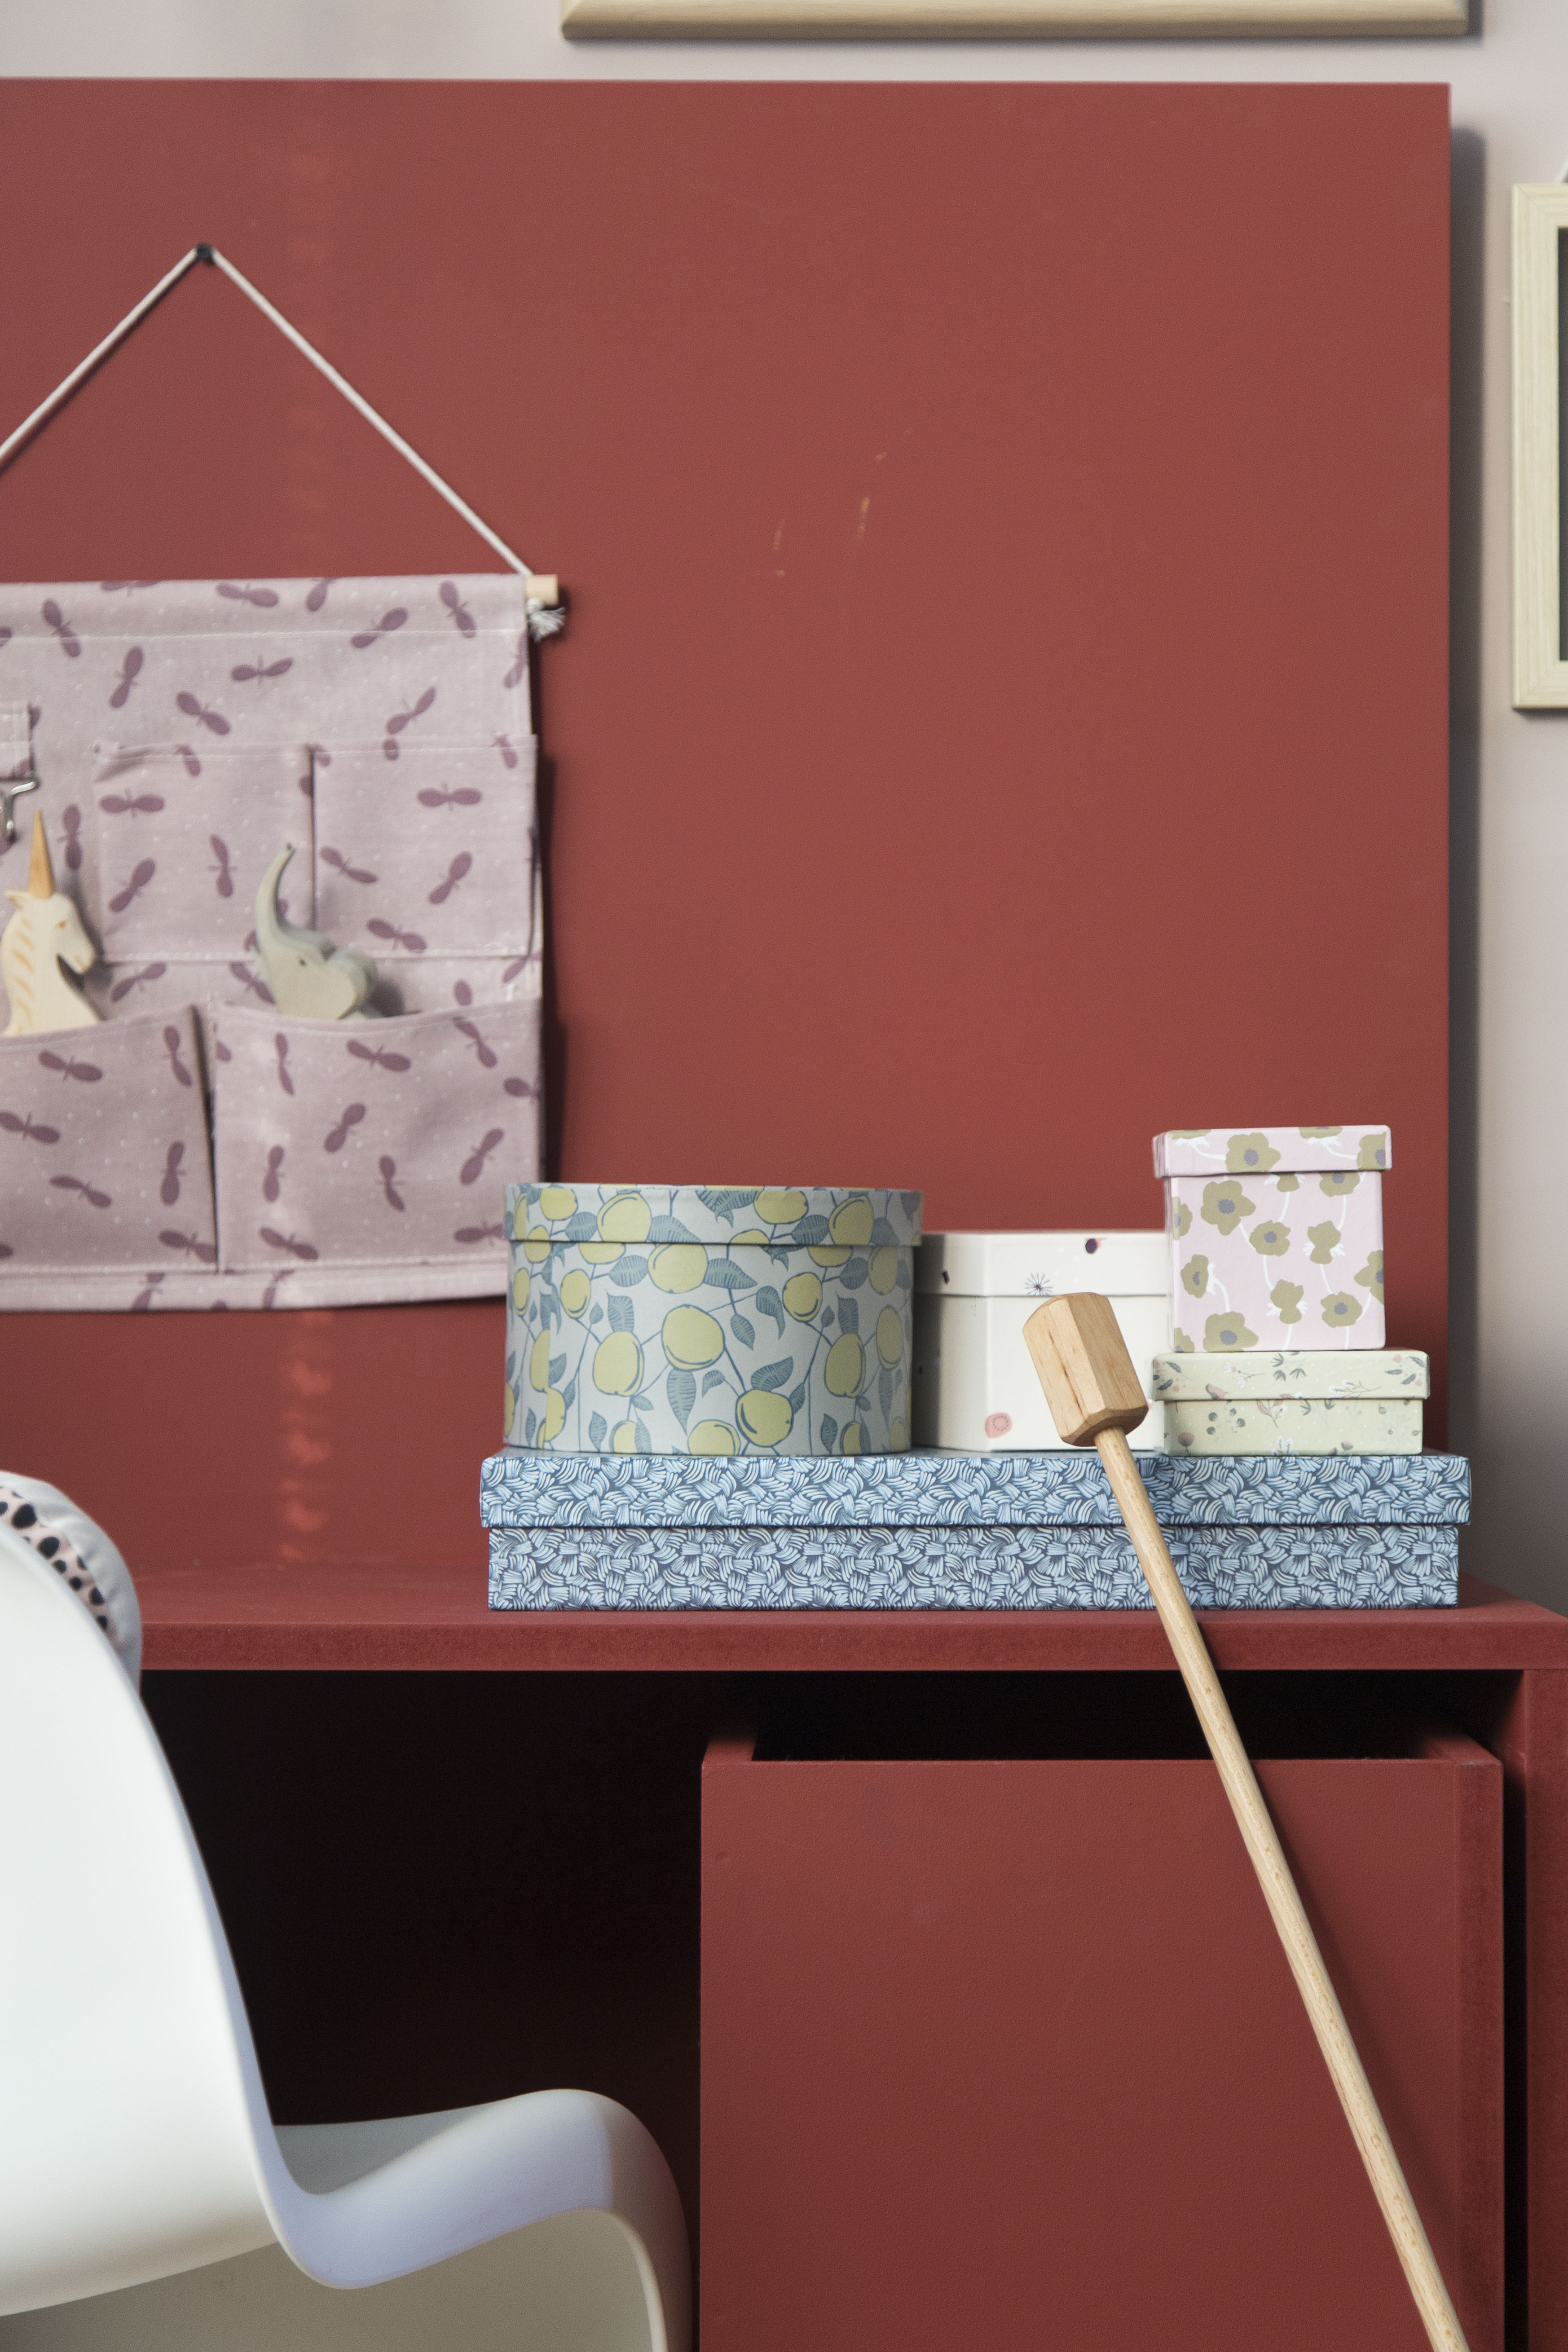
In the end we also did a storage box on wheels for, well, storage. We had some leftover MDF so decided to put it to good use! This play area needed to be fun, but also practical and with kids, more storage is always a good idea.
A few important sidenotes:
– this project needs to be done with 2 people, since you have to keep the MDF boards balanced while screwing them together.
– MDF needs pre-drilling before you screw it together. So we used 2 drill drivers for convenience; 1 for pre-drilling and 1 for the screws.
– MDF can be painted with wall paint or gloss paint. We used wall paint for two reasons; we wanted a matt finish and this was leftover paint from Mia’s room, so we could finish the jar and didn’t have to buy new paint. Very sustainable!
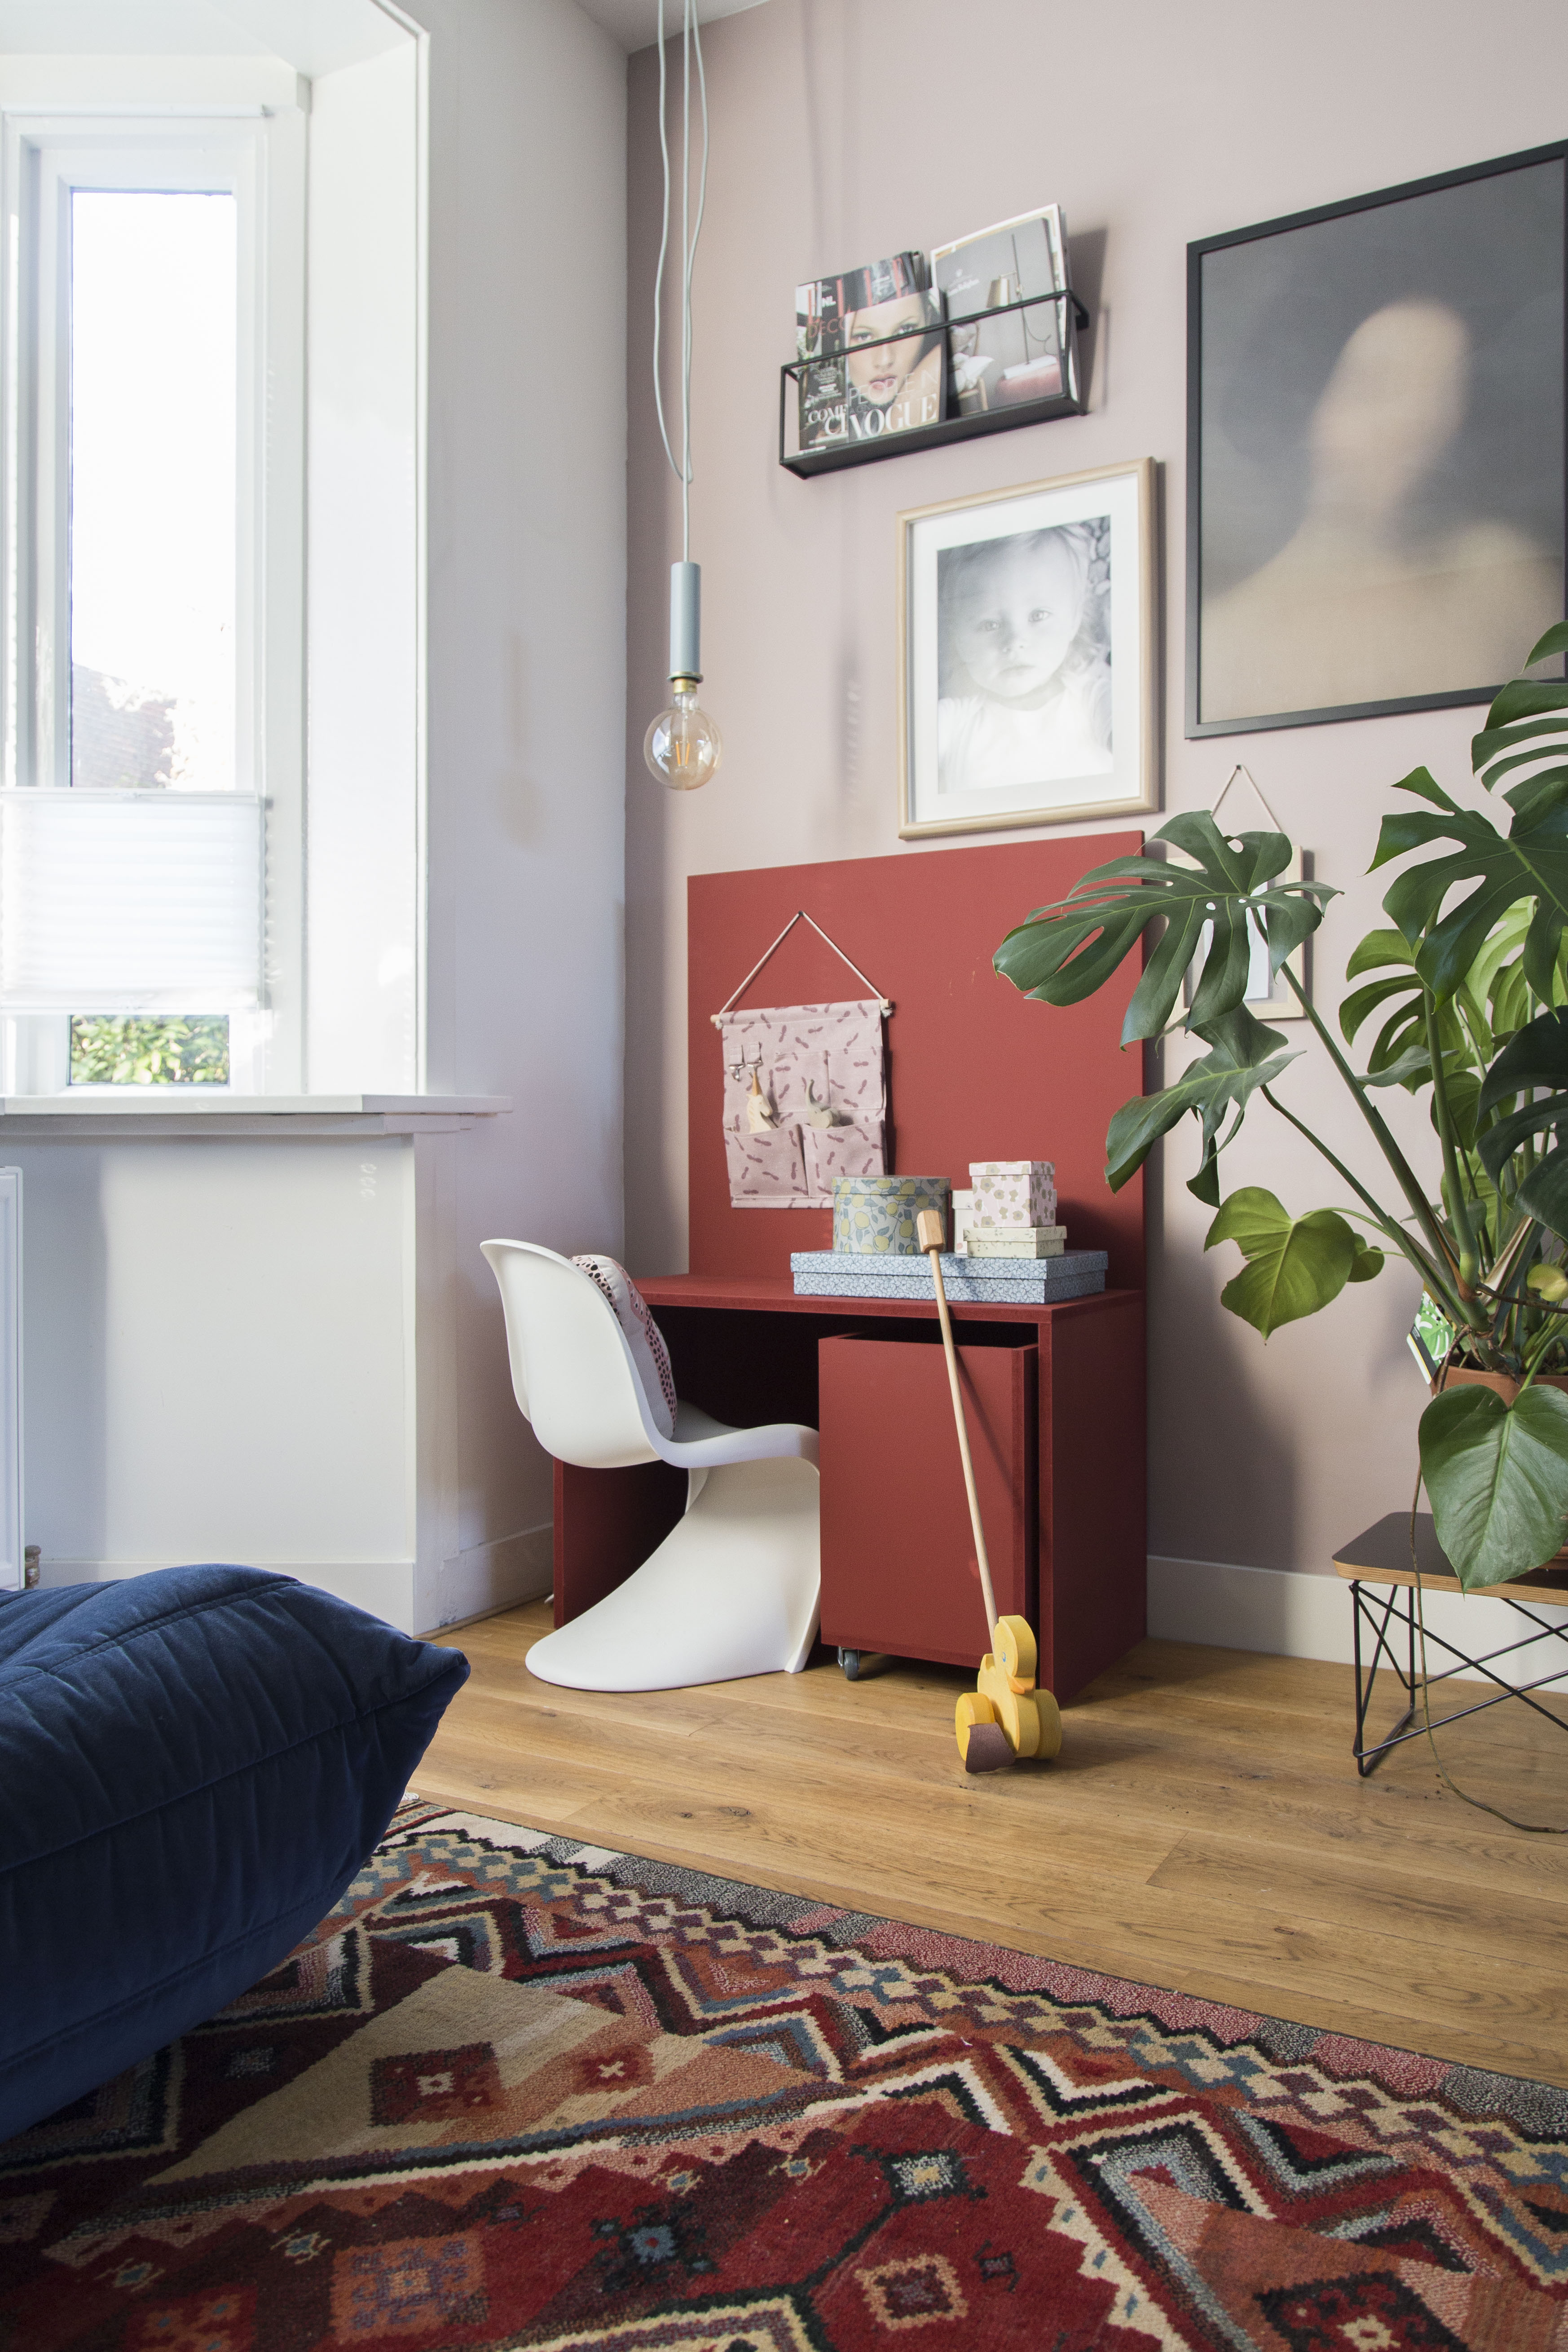
So that is our end result! We are very happy with it and hope Mia will enjoy it for years to come. We didn’t want to frame it to the wall because we still want to have the option of putting it somewhere else if we want to. But for now, I’m hoping for many play hours in the livingroom with Mia sitting at her table ♥

PS. This post was written in collaboration with BLACK+DECKER, the tools for this project were gifted to us. I only work with brands I love.
______________________________________
Nederlandse vertaling
Wat je nodig hebt voor dit project
– MDF
– boormachine
– zaag naar voorkeur, dit kan een cirkelzaag of handzaag zijn
– schuurmachine
– verf
Eerst hebben we de MDF in de juiste maten gezaagd. Omdat dit een DIY is kun je de maten naar je eigen wens bepalen. Wij wilden dat dit speelhoekje tussen de lijsten die er al hingen zou passen, dus hiermee bepaalden we onze maximale hoogte en breedte. Eerst zetten we het tafeltje in elkaar door de 3 delen in elkaar te schroeven. Let op! MDF moet je eerst voorboren. Wij gebruikten dus 2 boormachines; eentje voor het voorboren en de andere voor de schroeven, zo hoef je niet telkens van opzetstuk te wisselen. Toen het tafeltje in elkaar zat schroefden we de achterkant erop. Beter teveel schroeven dan te weinig, deze schroefgaten werk je later wel weg. Je hebt voor dit project 2 mensen nodig om het project tijdens het in elkaar schroeven in balans te houden. Als het in elkaar zit vul je de schroefgaten op met allesvuller en moet je even wachten tot dit gedroogd is. Dan kun je het gaan verven! MDF kan zowel met lak- als met muurverf geverfd worden, wij gebruikten een restje muurverf van Mia haar kamer. Zo konden we deze pot opmaken en hoefden we geen nieuwe te kopen, erg duurzaam! Van de reststukken MDF maakten we nog een opbergbak voor onder het tafeltje, wat bestaat uit 5 delen MDF aan elkaar geschroefd in de maat van keuze.
